From time to time Avastar provides new versions to keep up to date with Second Life and Blender. We assume that you also want to keep up to date and you update your Avastar installation as well.
However the implementation of the Avastar Rig itself also changes over time. This article describes what you need to do to get your Avastar updated and work with your “old” rigs in the new environment.
Update the Avastar Software
Updating Avastar is as simple as:
- Download the newest Avastar version
- Update Blender to the most current release
- Install Avastar
when the update fails
When you update an Addon in Blender, then normally the following steps are performed:
- The installer disables the current version of the Addon.
- The disabled addon is removed from the system (deleted from disk),
- The new Addon version is installed.
- You now can enable the new version manually
However sometimes the first step (disabling the Addon) does not disable all of the software. So it may happen that the old Addon leaves some traces which may result in subsequent errors when the new version is enabled in step 4.
When the above situation happens to you, then please proceed as follows:
Step 0: Remove traces
- Save User Setting at the bottom of the User Preferences Panel:
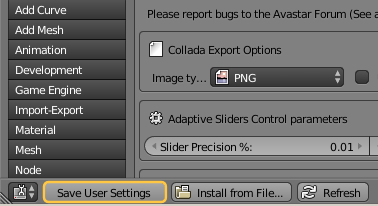
- Then close Blender
It is important that you really close blender.
Opening a new scene or pressing F8 are not enough! - Open Blender and open the User preferences again
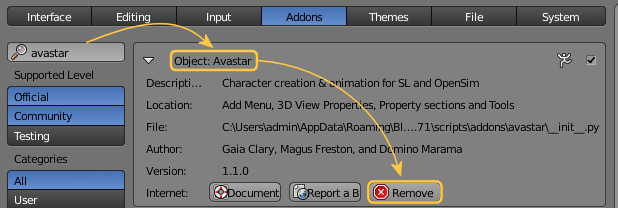
- Type “Avastar” into the Addon search field to locate your Addon
- Then Enable the Addon
In most cases this is all that you need to do. The Addon will enable without errors.
If the above procedure does not work for you, then you need to put blender into a clean state as follows:
Step 1: Remove Avastar
You find the Remove Button in the expanded Avastar Addon Panel:
Step 2: Save User Settings
You find the Save User settings Button at the bottom of the User Preferences Window:
Step 3: Restart Blender and Install the new Avastar Addon
Proceed by installing your Addon:
Update your Models
The Problem:
Whenever you create an Avastar in a scene, then a fresh character is created with its own meshes and its own Armature. So, when you upgrade to a newer version of Avastar, then the Rig is not upgraded automatically. This may result in compatibility issues.
The solution
We have included the Rig Upgrade Tool into Avastar. This Tool will take your Avastar model and migrates the Armature to the newest Avastar version in place. Below you find the Tool Help Page.
The Rig Transfer Tool
Convert non Avastar rig to Avastar
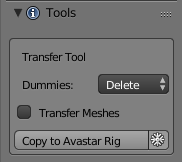
This mode is entered when you have selected an arbitrary (not Avastar) Armature or one or more mesh Objects which are bound to an armature. In that case the conversion tool offers to Convert the Armature “in place”:
- The original Armature will be deleted
- A new Avastar Armature will be created
- The assigned mesh objects will be moved to the new Avastar.
- For the additional options see below
Note: The Option Transfer Joints is critical. Please read below
Converting the Belleza Development Mesh (Avastar 1.7-3)
The Belleza Developer Dummy can be easily converted with the Avastar Conversion tool. Below you find a brief tutorial. For other development kits the procedure might be similar.
Load the Belleza Meshes
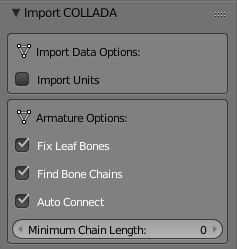
- Open the Collada Importer by using:
File -> Import -> Collada
- Take care the all import options are enabled
- Import the Belleza Rig
- Take care that the Belleza Armature is selected in OBJECT mode
Note: For older Blender release not all options might be available. But don’t worry, that is fine.
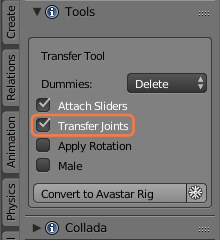
Set the Conversion options
- Open the Avastar Toolshelf
- Locate the Tool Panel
- Take care that Attach Sliders are disabled
- Take care that Transfer Joints is enabled!
- Finally hit the button Convert to Avastar
After a short while a new Avastar Armature appears and the Belleza Mesh gets attached to it.

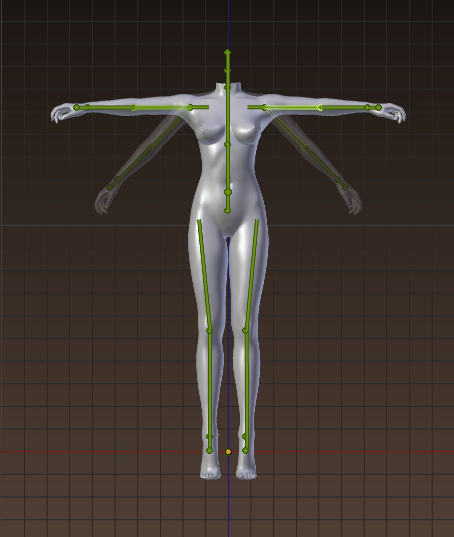
Note: The armature is rotated by 90 degree. This is on purpose! And you may now want to set the 3D View to Front View.
Convert your Mesh to T-Pose
- Select the Armature
- Enter Pose mode
- Now bend the arms by 45 degree upwards
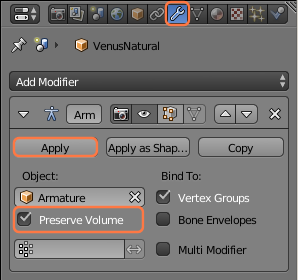
- Finally Select the Mesh in Object mode
- Open the Modifier stack of the Mesh
- In the Armature modifier enable Preserve Volume
- Apply the Armature
Now you have converted the Belleza Mesh into a T posed Mesh. You can delete the Armature as we do not need it any longer. We must only keep the T posed Mesh for now.
Note: In principle you could even reuse the Avastar Armature for the next step. But lets make things in the most clean way first. You can later experiment on your own to improve this workflow.
Bind the T Posed Mesh to Avastar
- Create a new Avastar Armature (Rig Only)
- Open the Appearance Sliders
- Click the white Stickman Icon to get the Armature into Restpose
- Select the Armature and the Mesh
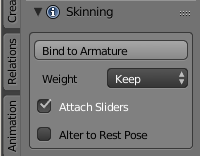
- Open the Skinning Panel
- Bind the Mesh with the Keep Weights option (see image)
Now the Appearance sliders should work and the Belleza Mesh is rigged to Avastar.
Update old Avastar Rig to newest version
This mode is entered, when you have selected an older version of an Avastar Armature (by opening an older project blend file for example) or you selected a mesh that is bound to an older Avastar Armature. In that case the conversion tool offers to Update the Armature “in place”
- The original Armature will be deleted
- A new Avastar Armature will be created
- The assigned mesh objects will be moved to the new Avastar.
- All possibly edited Bones (Joints) will be transferred.
Update an Old Avastar Rig to the newest Version (in Place)
Copy an Armature to an existing Avastar
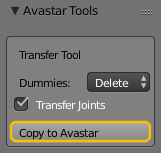
This mode is entered, when you have selected 2 armatures, of which the active Armature is either an outdated Avastar armature or an arbitrary non Avastar Armature, and the other armature is a new Avastar Armature. In that case the conversion tool offers to Copy the Active Armature’s configuration to the other selected Armature:
Copy Avastar to Avastar
- The original Armature will be kept
- All possibly edited Bones (Joints) will be transferred
- For the other options see below
Copy an (old) Avastar Rig to another Avastar Rig
Copy SL Compatible Rig to Avastar
- The original Armature will be kept
- The assigned mesh objects will be copied to the Avastar.
- For the other options see below
Copy an SL compatible Rig to an Avastar Rig
Options
This option controls the Avastar Meshes in the Target Armature. Depending on the use case you will want Avastar to handle these meshes differently :
- Keep: Use for Mesh Attachment creation
- Hide: Use for Human Character Creation
- Delete: Use for non Human character Creation
When your Armature has been edited, then you need to copy the modified bones to the Target Armature. Functionally all that is needed is to transfer the relative position of the bone joints.
You might want to only copy the Armature settings to the Target Armature